1Introduction
This manual explains the installation, configuration and usage of the payment module for WooCommerce and First Cash Solution.
Before beginning with the installation, please make sure that you are in possession of all necessary data:
- You should have received a Merchant ID from First Cash Solution for the test account. Furthermore, you have received the corresponding user name and password
- Encryption password and HMAC-Key
- An Analytics Password which you require for logging into First Cash Solution Analytics
- WooCommerce payment module by sellxed.com/shop
- Access data to your server and shop
In case you don't yet have a contract with First Cash Solution, you can gladly acquire it directly through us.
Note that you must use at least PHP version 5.6 for our plugins. PHP 8 or higher is currently not supported.
1.1Process of the Installation
In this document you will find all important information for the installation of the module. It is important that you strictly follow the checklist. Only by doing so, can a secure usage in correspondence with all security regulations be guaranteed.
- Basic configuration of the server including the setting up of the notify script
- Configuration of the basic settings of the payment module
- Configuration of the payment methods
- Carrying out of a test purchase with the attached test data at the end of this document
- If the test was successful, your account can be activated
Our payment plugins should have per default the correct settings for most of our customers' preferences. That means once you have entered the required credentials in the plugin configuration to connect your account to your website, the plugin should be fully operational. Should you be willing to receive detailed information on a setting you do not know, you may contact our support team who will be able to assist you further.
Our support team is at your disposal during regular business hours at: http://www.sellxed.com/support. Furthermore, you have the option of ordering our installation service. We will make sure the plugin is installed correctly in your shop: http://www.sellxed.com/shop/de/integration-und-installation.html
In order to test the module, any kind of directory protection or IP blocking on your server must be deactivated. This is crucial as otherwise the payment feedback of First Cash Solution might not get through to the shop.
1.2System Requirements
In general, the plugin has the same system requirements as WooCommerce. Below you can find the most important requirements of the plugin:- PHP Version: 5.4.x or higher
- OpenSSL: Current version with support for TLS 1.2 or higher.
- fsockopen: The PHP function fsockopen must be enabled. The plugin must be able to connect to external systems over the Internet.
- PHP Functions: All common PHP functions must be enabled.
2Configuration of the Payment Module and the Server
In order to perform the configuration of the main module of WooCommerce, the following information is necessary. You should have received the information from First Cash Solution.
- First Cash Solution Live Merchant ID
- First Cash Solution Live Encryption Key
- First Cash Solution Live Signature Passphrase
Enter the credentials directly inside the configuration of the main module. After you performed some test payments, you can switch between Live Mode and Test Mode.
2.1Configuration of the Payment Module
For the usage of the gateway in your shop, fill in all received access data at its corresponding place in the main module and in the payment methods.
Please Note if you use hidden this poses additional PCI requirements to your shop that have to be met. Get in touch with First Cash Solution to get additional information.
Also if you use Hidden in your Module please advise First Cash Solution that they are able to configure your paynow settings accordingly.
3Module Installation and Update in the WooCommerce Shop
3.1Installation
At this time you should already be in possession of the module. Should this not be the case, you can download the necessary files in your customer account in the sellxed shop (Menu "My Downloads Downloads"). In order to install the module in your shop, please carry out the following steps:
- Download the plugin. The download can be found in your sellxed.com account under "My Downloads".
- Unzip the archive you have just downloaded.
- In the unzipped folder navigate to the folder "files"
- For some shops there are different versions of the plugin provided. If this is the case open the folder which corresponds to your shop version.
- Using your preferred FTP client upload entire content of this folder into the root directory of your shop. For some shops there is a specific folder containing the plugins. If that is the case upload the plugin into this folder. Make sure that the folders aren't replaced but merely merged.
- If you haven't yet done so, log back into your shop.
3.2Updates and Upgrades
You have direct and unlimited access to updates and upgrades during the duration of your support contract. In order to receive constant information about available updates we ask you to subscribe to our RSS feed that we publish for your module.
More information regarding the subscription of this RSS feed can be found under: http://www.sellxed.com/en/updates_upgrades.
We only recommend an update if something doesn't work in your shop, if you want to use new feature or if there is a necessary security update.
3.2.1Update Checklist
We ask you to strictly comply with the checklist below when doing an update:
- Always do a backup for your database and your files in your shop
- Use always a test system to test the update process.
- Wait until all the files are copied to the shop, clear the cache if there is one in your shop and then visit the configuration page of the main module so that the update process will be initialized.
Please test the update procedure first in your test shop. Our support team is able and willing to help you if you experience problems with the update process. However, if you decide to perform the update directly in your live shop there is the possibility of a downtime of the shop of more than two days depending on the availability of our support if you do not want to book our complementary support.
Depending on the version it could be that the database has to be migrated. We recommend you therefore, to perform the updates in times when the shop is not visited too frequently by your customers.
3.2.2Update Instructions
Please always read the update instruction. Those instructions can be found in the changelog. If there are no special remarks, you can proceed by just overwriting the files in your system.
4Module Configuration in the WooCommerce Shop
The configuration consists of two steps. The first step is the configuration of the main module with all the basic settings (cf. Configuration of the Main Module). During the second step you can then carry out individual configurations for each payment method . This allows for full flexibility and perfect adaptation to your processes.
Please create a backup of the main directory of your shop. In case of problems you will then always be able to return your shop to its original state.
We furthermore recommend testing the integration on a test system. Complications may arise with third party modules installed by you. In case of questions, our support is gladly at your disposal.
4.1Configuration of the Main Module
You can activate the plugin by clicking "activate" under the module WooCommerce First Cash Solution in the menu Plugins.
After the Installation of the plugin a new menu on the dashboard will appear called First Cash Solution . Enter all data in the corresponding fields. Each option is, furthermore, explained in short info texts in the shop.
4.2Configuration of the Payment Module
After having successfully configured the main module, you can find the settings for the individual payment methods in your shop under WooCommerce > Settings > Checkout (In earlier version it was WooCommerce > Settings > Payment Gateways). Each payment method is listed individually. Install the payment methods you wish to offer to your customers. You can carry out individual settings for each payment method and thereby optimally adapt the payment methods to your existing processes. The most central options are described in more detail further below.
By clicking on Enable the payment method is activated in your shop. For more detailed information on the settings, please refer to information provided directly within the module configuration.
4.3Direct Capturing of Transactions
The option "Capture" allows you to specify if you wish to debit payments directly or if you first wish to authorise them and then debit the payment at a later point.
Depending on your acquiring contract, a reservation is only guaranteed for a specific period of time. Should you fail to debit the payment within that period, the authorisation may therefore no longer be guaranteed. Further information on this process can be found below.
It may be that settings saved in the payment modules overwrite settings saved in First Cash Solution.
4.4Uncertain Status
You can specifically label orders for which the money is not guaranteed to be received. This allows you to manually control the order before shipment.
4.4.1Setting the order state
For each payment method you may select in which state the order should be set to depending on the booking state. This is the initial state of the order.
4.5Optional: Validation
Note: It can be that this option is not visible in your module. In this case just ignore this section.
With the option 'Validation' you can define the moment when the payment method should be made visible to the customer during the checkout process. This setting is relevant for modules where the usage depends on the customer's compliance with specific preconditions. For example, if a solvency check has to be carried out or if the payment method is only available in certain countries. In order for the credit check or address validation to also work with European characters, the charset of the "Blowfish mode" must be set to "UTF-8" for certain PSP settings.
You have the choice between these options:
- Validation before the selection of the payment method: A validation verification is carried out before the customer selects the payment method. If the customer does not fulfill the requirements, the payment method is not displayed
- Validation after selection of the payment method: The verification of the compliance occurs after the selection of the payment method and before the confirmation of the order
- During the authorisation: The validation verification is carried out by First Cash Solution during the authorisation process. The payment method is displayed in any case
4.6Redirection / Payment Form Error
If the successful redirection to the payment page suddenly stops working or you are only able to see the header and footer of your template instead of the payment form, you might be affected of the following issue. As a first step, you should update your payment plugin to the latest version, deactivate it in the backend of WooCommerce and activate it again.
If you are using WPML it can happen that the page for the redirection of the customer to First Cash Solution payment page results in a '404 Page Not Found' error. In this case, you will have to duplicate our checkout page under 'Pages' in the corresponding languages. In order to do so please follow these steps:
- Go to the WooCommerce backend and select: Pages > All Pages. There you should find a Page called "First Cash Solution Checkout".
- Delete all existing pages called “First Cash Solution Checkout”.
- In the plugin section of your Wordpress dashboard, deactivate the WooCommerce First Cash Solution plugin and activate it again. This will help you to generate a new redirection page.
- Navigate again to Pages > All Pages. Open the configuration of the new redirection page.
- On the right hand side under 'languages' you can now duplicate the content of this page for all of your installed languages. When you have successfully saved the changes, this page will be active for all of your languages and the error should have disappeared.
5Settings / Configuration of Payment Methods
5.1General Information About the Payment Methods
The plugin contains the most common payment methods. In case a desired payment method is not included per default, please contact us directly.
In order to be able to use a payment method, it must be activated in your account with First Cash Solution as well as in your shop. Information about the configuration of the payment methods can be found further above.
Below you can find important information for specific payment methods that deviate from the standard process.
5.2Information on Payment Status
For each payment method you can define an initial payment status (status for authorized payments etc.). You hereby define the payment status for each state depending on the processing type of the order (captured, authorized, etc.). It's the initial status which the order assumes. Depending on the mutation carried out by you, the status can change.
Never set the status to Pending First Cash Solution or any similar pending status which is implemented by the module.
5.2.1Order status "pending" / imminent payment (or similar)
Orders with the status 'pending First Cash Solution' are pending orders. Orders are set to that status if a customer is redirected in order to pay but hasn't returned successfully or the feedback hasn't reached your shop yet (Customer closed window on the payment page and didn't complete payment). Depending on the payment method these orders will automatically be transformed into cancelled orders and the inventory will be cleared (so long as the Cronjob is activated). How long this takes depends on the characteristics of the payment method and cannot be configured.
If you have a lot of pending orders it usually means that the notifications from your webserver to First Cash Solution are being blocked. In this case check the settings of your firewall and ask the Hoster to activate the IPs and User Agents of First Cash Solution.
5.2.2Order status "cancelled"
Orders with the status "cancelled" have either been set to that status automatically due to a timeout, as described above, or have been cancelled directly by the customer.
5.3Payment Methods
The modules differentiate between the standard and the professional version. In the professional version, all payment methods available for First Cash Solution are integrated. With the standard version, however, you only receive the most common payment methods. Should a desired payment method not be available, please contact us directly.
5.4MasterPass Integration: What to keep in mind
If you integrate MasterPass as a payment method in your shop, you have two integration options: External and Standard Checkout. When using External Checkout, the customer does not have to provide address data during checkout. The customer only needs a MasterPass account and the data will be transmitted by MasterPass. In order to use this option as a merchant, you have to activate this payment method with First Cash Solution.
Please keep in mind, that using additional functions such as address transmission through MasterPass, may require the activation of the respective options through First Cash Solution aktiviert.
In order to use MasterPass in compliance with the MasterCard guidelines, please read the following information carefully before using this payment method.
5.4.1Integration Possibilities for MasterPass
MasterPass can be integrated as a normal payment method with redirection to First Cash Solution or as an external checkout.
5.4.1.1MasterPass as a Payment Method
If you like to integrate MasterPass as a normal payment method, activate the payment method as usual (seeConfiguration of the payment method). In this scenario the customer will first be redirected to MasterPass and then to the wallet of the issuer.
5.4.1.2MasterPass as External Checkout
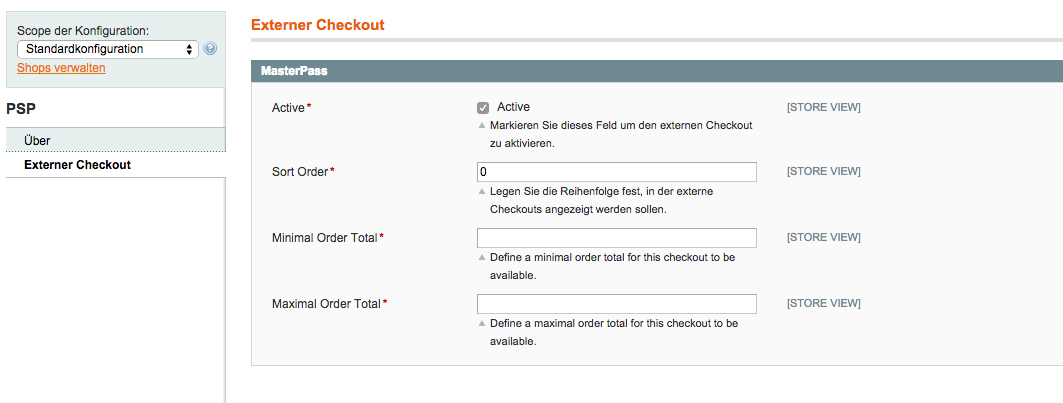
If you integrate MasterPass as an external Chekout, you can minimize the steps towards the payment radically. The adress transfer and the creation of the account is processed via MasterPass. If you activate the external checkout, there appears a button in the basket with which you can jump after the login directly to the last step of the order confirmation. The creation of the account happens in the background.
For the activation of the external checkout go to First Cash Solution . There you'll find all settings for the external checkout:
MasterPass as external checkout is not for all cases available. If this point in the manual doesn't appear, please make sure to contact us.
5.4.2Checkout: MasterPass Learn More Button
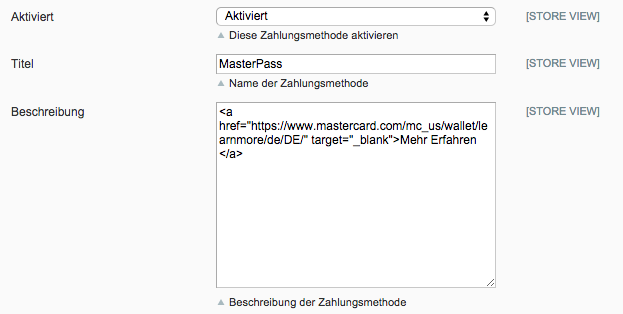
When using MasterPass as a payment method for standard checkout, it is mandatory to link to the MasterPass Learn More Page. In order to do this, navigate to Payment Method Configuration. Paste the link for the Learn More Page into the field 'Description' for the respective languages. The field 'Learn More' will now be displayed when choosing a payment method.
We have already collected the most important links for you. You only have to copy and paste the links into the description field:
- German:<a href="https://www.mastercard.com/mc_us/wallet/learnmore/de/DE/" target="_blank">Mehr Erfahren </a>
- French:<a href="https://www.mastercard.com/mc_us/wallet/learnmore/fr/FR/" target="_blank">apprendre plus </a>
- English: <a href="https://www.mastercard.com/mc_us/wallet/learnmore/en/DE/" target="_blank">Learn More </a>
- Spanish:<a href="https://www.mastercard.com/mc_us/wallet/learnmore/en/ES/" target="_blank">aprender más </a>
- Italian:<a href="https://www.mastercard.com/mc_us/wallet/learnmore/it/IT/" target="_blank">saperne di più </a>
- Dutch:<a href="https://www.mastercard.com/mc_us/wallet/learnmore/nl/NL/" target="_blank">Leer Meer </a>
Links for additional languages can be found in this document: https://developer.mastercard.com/...
5.4.3Additional information
General and additional information on using the MasterPass trademark and logo in your webshop are available in the official MasterPass Mechant Branding Requirement Document. which you can access here: https://developer.mastercard.com/...
6The Module in Action
Below you will find an overview of the most important features in the daily usage of the First Cash Solution module.
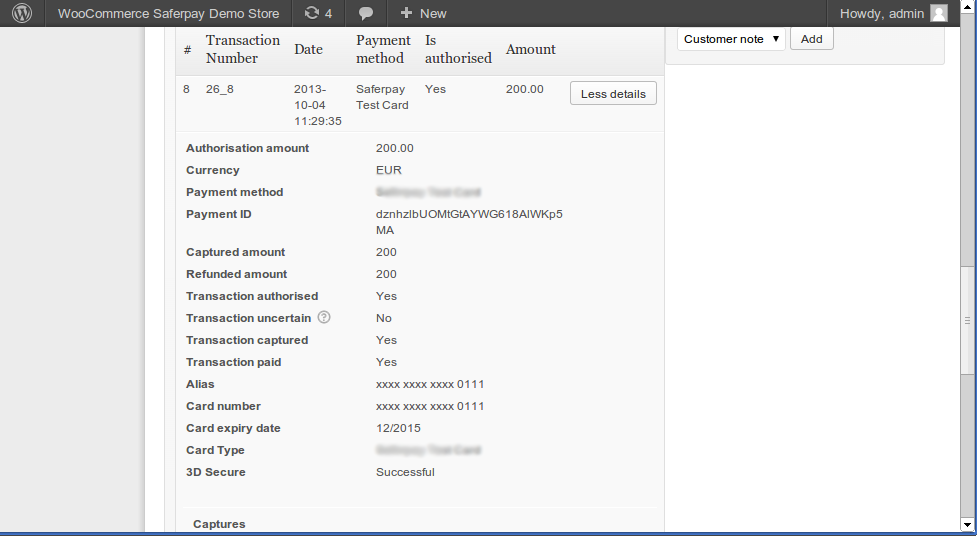
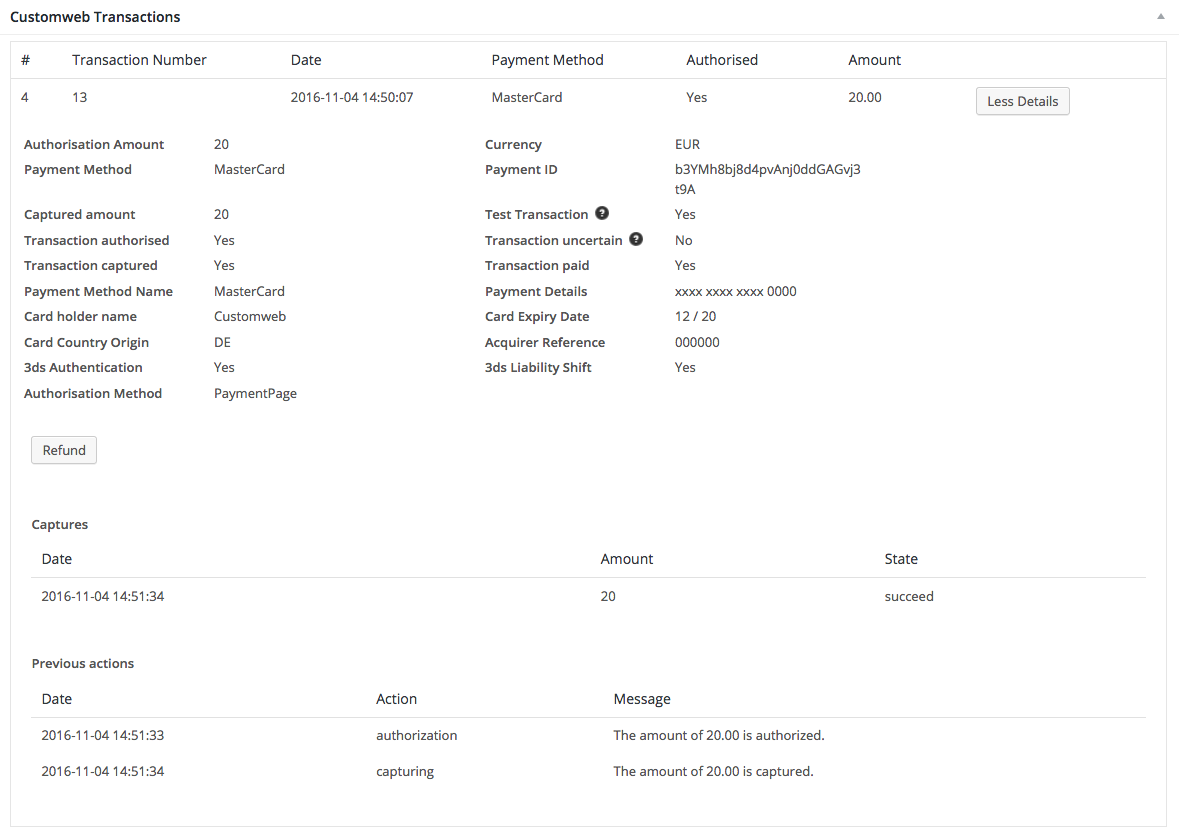
6.1Useful Transaction Information on the Order
You can find an overview of the transaction information in within the order detail view. Among others, this information allows for the definite attribution of the orders to their corresponding transaction, seen in the backend of First Cash Solution.
6.2Usage of the Alias Managers / Token Solution
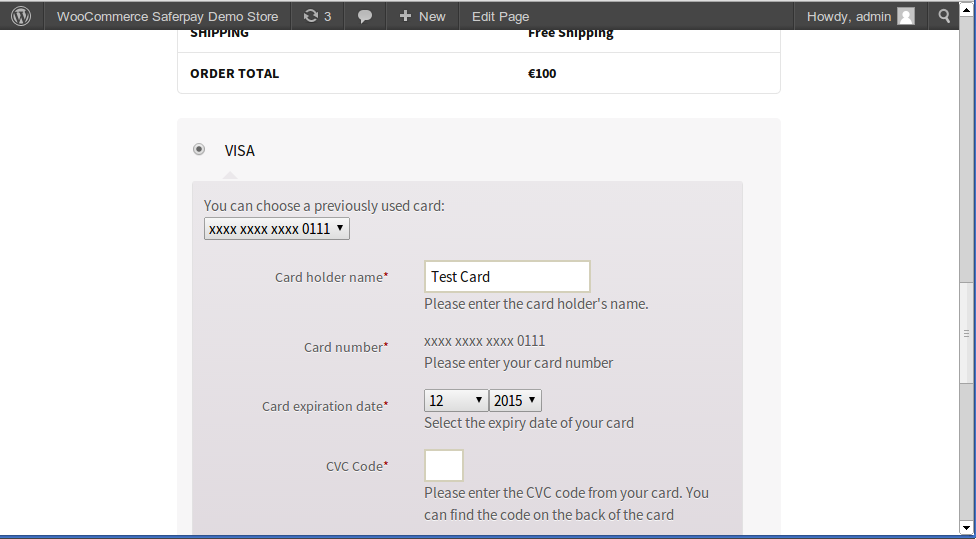
With the Alias Manager, your customers can securely save their credit cards with First Cash Solution for later purchases. You can enable this by activating the option "Alias Manager" in the configuration of the Payment Method. The customer can then choose from his or her saved credit cards without having to re-enter all the details.
The usage of the Alias Managers requires the activation of the correct option with First Cash Solution. To do so, please contact the support directly.
6.3Capturing of Orders
The transaction management between your shop and First Cash Solution is not synchronized. If you capture payments with First Cash Solution, the status in the shop will not be updated and a second capturing in the shop is not possible.
In order to be able to capture orders you must make sure that you have set the option 'Capturing' to 'deferred' in the payment method configuration.
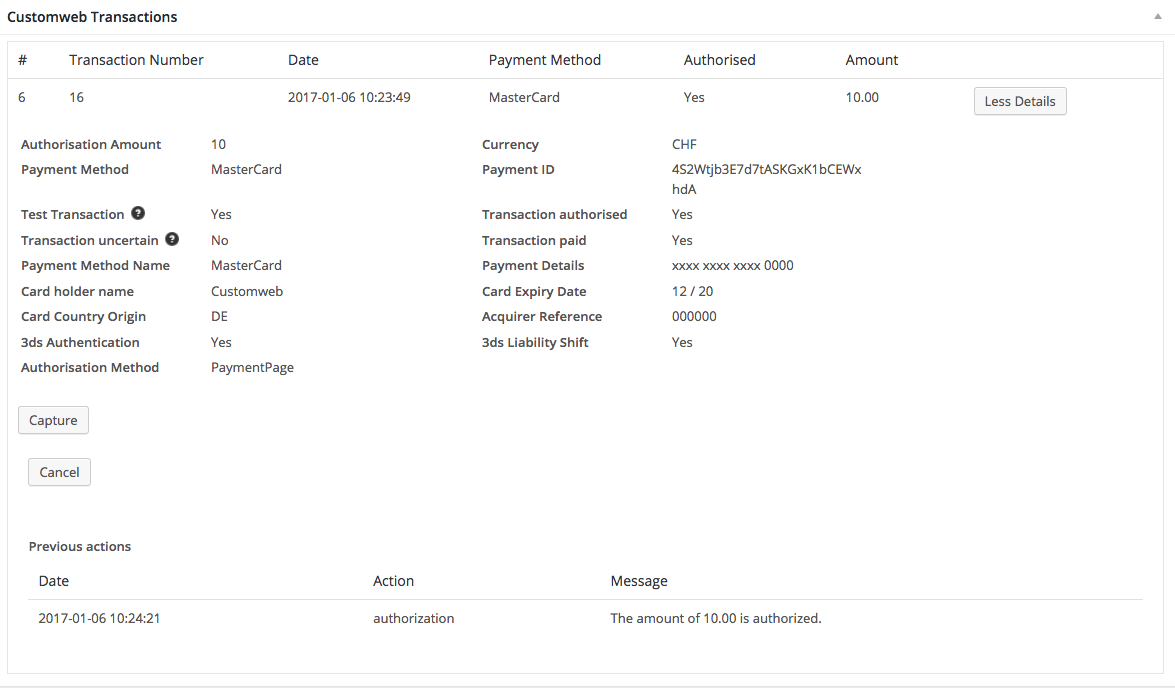
Open the order and look for the First Cash Solution transaction tab at the bottom. Capturing via the internal operation of WooCommerce is not supported.
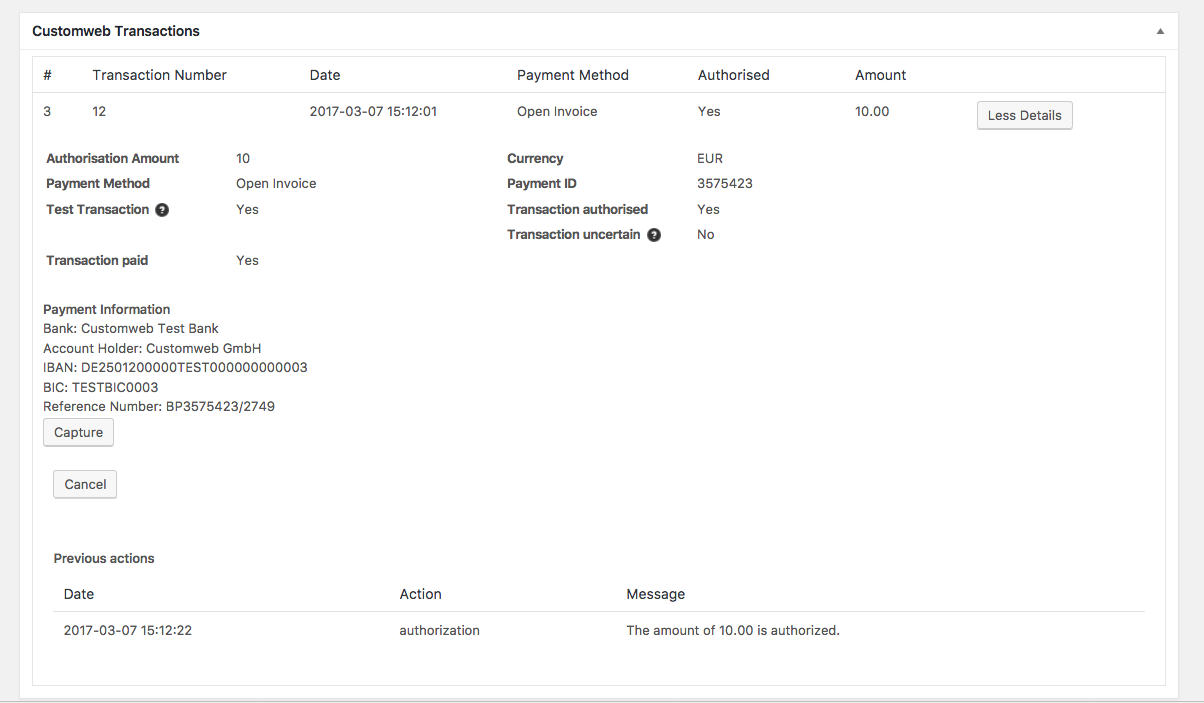
Click on "More Details" to view the transaction details. By clicking Capture button, you get into the following context.
Enter the amount of your choice that you wish to capture from the customer's card. By clicking Capture a direct capturing of the order occurs with First Cash Solution.
Please be aware that cancelling the transaction does not cause a status change of the order.
6.4Refunds
You can refund already captured transactions and automatically transmit them to First Cash Solution.
That the default WooCommerce functionality is not supported by our plugin.
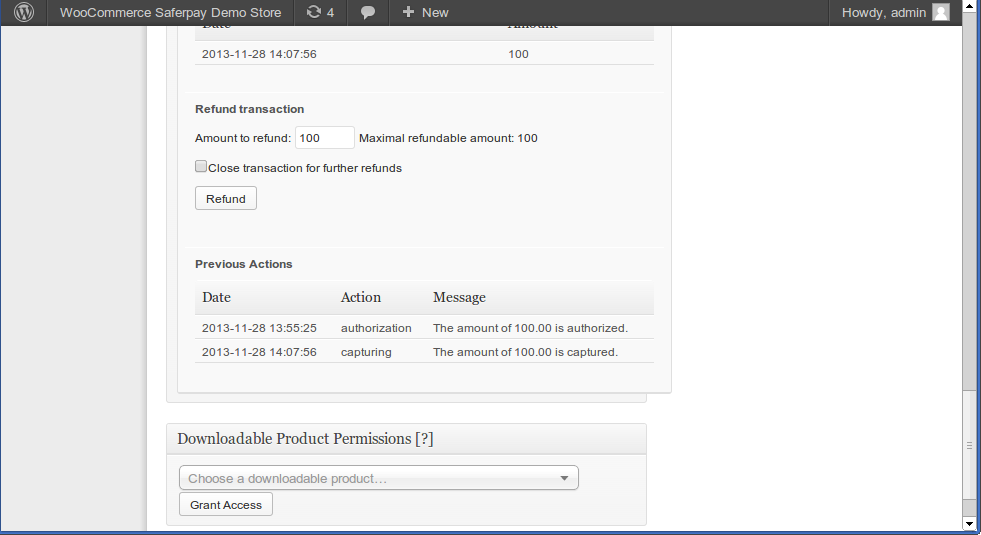
By clicking Refund button, you get into the following context.
Just like for the capturing, you open the order and click on the magnifying glass next to the order of your choice. Enter any refund amount of your choice in the field provided for this purpose. By clicking refund the refund request will directly be sent to First Cash Solution and the specified amount will be credited on the customer's credit card.
Please note that you can't refund more than 100% of the original amount.
Furthermore, please be aware that processing a refund will not cause a status change of the order.
6.5Transaction Process
Each action affiliated with transaction management is logged by the module.
6.6Using Invoice Details of a Processor
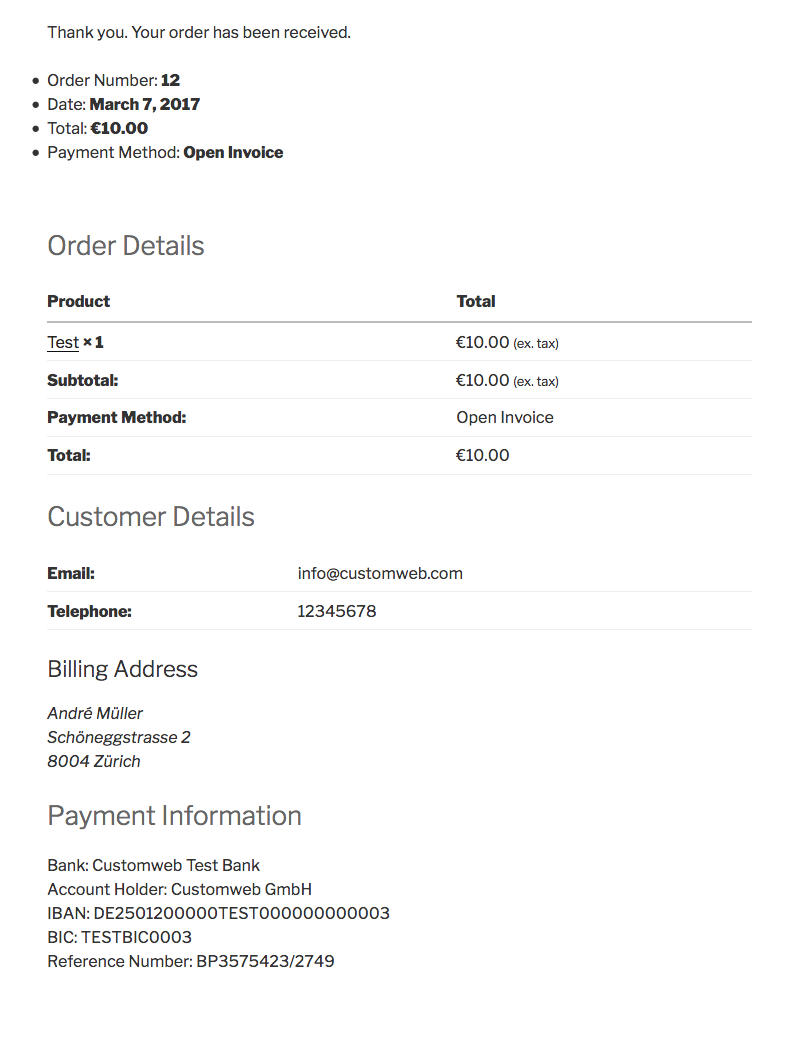
In the following context you can view or embed the "payment details" of for example an "Open Invoice" transaction:
6.6.1WooCommerce Order Confirmation (E-Mail)
The "payment information" will be visible in the default "order confirmation e-mail" of WooCommerce.
6.6.2WooCommerce Invoice (PDF)
The "payment information" will be visible in the default WooCommerce-Invoice.
6.6.3WooCommerce-Backend (Transaction details)
You can view the transaction details in WooCommerce under WooCommerce > Orders > First Cash Solution transactions > More Details.
6.6.4WooCommerce Success-Page
6.7Setup a Cron Job to Activate the Timed Operations
To activate the timed operations of the plugin (e.g. update service, deleting pending orders, etc.) make sure that you set up the WooCommerce Cron engine. Especially the update function allows you to automatically retrive additional information or changes of your order directly via the API of First Cash Solution. Please note it could be that in order to use the update feature it may be necessary that First Cash Solution activates additional options in your account.
The module uses the standard cron engine of WooCommerce. More infromation regarding the set up can be found here.
7Testing
Before switching from test to live mode it is important that you test the module extensively.
Do not forget to switch the operating mode from test to live after having successfully tested the module.
7.1Test Data
In the following section you can find the test data for the various payment methods:Card number 5555555555554444 Expiry Date 12/2023 CVC 123 | Mastercard |
Card number 4000012892688323 Expiry Date 12/2020 CVC 123 | Visa |
Card number 5555555555554444 Expiry Date 12/2023 CVC 123 | Mastercard |
Card number 4000012892688323 Expiry Date 12/2020 CVC 123 | Visa |
| Direct | |
Last Name Wischnewski First Name Hans-Jürgen Birtday 1973-12-27 Street Müllerstraße 137 Postcode 13353 City Berlin Country DE Phone 03018425165 | RatePay: B2C |
Company Name Imperium UG Sales Tax Number DE123456789 Last Name Descartes First Name René Birtday 1973-12-27 Street Odeonplatz 1 Postcode 80539 City München Country DE Phone 08945687541 | RatePay: B2B |
BIC BYLADEM1ROS IBAN DE36711500000009290701 | InterCard: Accepted |
Customer ID customer1 Company Must be empty Gender FEMALE Firstname Julia Lastname Tester Street Aalener Str. 57 Post Code 73492 City Rainau Country DE Phone 07361889969 E-Mail julia@tester.com Birtday 1987-10-25 | Paymorrow: Accepted |
Card number 4355084355084358 Expiry Date 12/2020 CVC 000 | Visa |
Procedure Use any valid German address. The first two attempts are
succesful. The third will fail.
| BillPay |
Company Must be empty Firstname Paul Lastname Positiv Street Teststr. 4 Post Code 49084 City Osnabrück Phone 095198009 | BillSAFE: Accepted |
Test Data http://developers.klarna.com/en/testing/invoice-and-account
| Klarna |
Last Name Wischnewski First Name Hans-Jürgen Birtday 1973-12-27 Street Müllerstraße 137 Postcode 13353 City Berlin Country DE Phone 03018425165 | RatePay: B2C |
Company Name Imperium UG Sales Tax Number DE123456789 Last Name Descartes First Name René Birtday 1973-12-27 Street Odeonplatz 1 Postcode 80539 City München Country DE Phone 08945687541 | RatePay: B2B |
7.2Testing - First Cash Solution Simulation Mode
Any kind of payment method can be tested with our modules. The "Operation Mode" corresponds to the simulation mode with First Cash Solution. Payments with a total of less than 10'000 EUR are always accepted.
8Errors and their Solutions
You can find detailed information under http://www.sellxed.com/en/faq. Should you not be able to solve your problem with the provided information, please contact us directly under: http://www.sellxed.com/en/support
8.1Page Not Found Error prior to the redirection to Payment Page
If you are using WPML it can occur that the Pages for the display of the payment methods or for the redirection to First Cash Solution end in a Page Not Found Error.
In this case you have to duplicate our Pages in the corresponding languages. In order to do so please follow these steps:
- Go to the main menu and select Pages > All Pages. There you should find a Page called First Cash Solution Checkout.
- Open the configurations.
- On the right hand side under languages you can now duplicate the content of this page for all of your installed languages. When you have successfully saved the changes this page will be active for all of your languages and the Error should have disappeared.
8.2The Referrer URL appears in my Analytics Tool
When a customer and the notification are redirected via Header Redirection, the First Cash Solution Referrer URL might appear in your Analytics Tool thus hiding the original traffic source. However, most Analytic Tools are able to minimize this problem.
In case you are using Google Analytics as reporting tool, this step by step guide may help you to exclude the URLs: under bullet point 4.
9Compatibility with Third-Party Plugins
The plugins listed below are compatible with our payment modules and allow you to handle certain tasks in an easier way.
9.1Fee's and discount's within WooCommerce
To configure a First Cash Solution payment gateways based fee and discount you will need the following 3rd-Party plugin.
9.2Multilingual WooCommerce sites
To run multilingual WooCommerce sites you will need the following 3rd-Party plugin.
9.3Birthday and gender in WooCommerce
For certain payment service providers it is necessary to check the birthday and the gender of a customer. WooCommerce does not check this by default.
- Either add custom checkout field yourself or download Flexible Checkout Fields to do so.
-
Modify the order context getters to return the value of your custom checkout field from the order / session (or wherever the previous step saves the data).
Order Context Getters
- AbstractOrderContext
- getBillingDateOfBirth()
- getBillingGender()
These functions can be found in "wp-plugins/woocommerce_fcsolutioncw/classes/FCSolutionCw/AbstractOrderContext.php".
10Error Logging
The module will log different unexpected errors or information depending on the configured level. If there is any issue with the module, this log can help identify the cause.
10.1Log Levels
You can configure the log level in the First Cash Solution settings.
- Error: Logs unexpected errors only. (Default)
- Info: Logs extended information.
- Debug: Logs information helpful for debugging.
10.2Log Location
The log file is stored in wp-content/uploads/wc-logs. Please make sure the path exists and it is writable by the webserver.
11Advanced Information
This section of the manual is for advanced usage of the module. The content is for advanced users with special requirements. Everything in this section is optional and not required for the daily usage of the module.
11.1Transaction Object
This section describes how to extract information from a transaction, if you need it for further processing. E.g. you require more information of the transaction for further processing an order in your ERP system.
The code snippets in this section assume your script resides in the root folder of the shop with the default shop folder structure.
require_once( dirname(__FILE__) . '/wp-load.php' );
require_once ABSPATH.'wp-content/plugins/woocommerce_fcsolutioncw/classes/FCSolutionCw/Util.php';
$transactionById = FCSolutionCw_Util::getTransactionById($transactionId);
$transactionObject = $transactionById->getTransactionObject();
$transactionByExternal = FCSolutionCw_Util::getTransactionByTransactionNumber($externalId);
$transactionObject = $transactionByExternal->getTransactionObject();
$transactionsByPostId = FCSolutionCw_Util::getTransactionsByPostId($orderId);
foreach($transactionsByPostId as $transaction){
	$transactionObject = $transaction->getTransactionObject();
	//Do something with each object
}


